Showing posts with label crafts. Show all posts

Saturday, February 9, 2013

Last Minute Valentines for School Teachers

Just when you thought you were aaaaalll ready for your kid's school function....
BAM!
          Wrong.

I swore I had Valentine's Day all wrapped up in a neat, little "ha-ha, I'm all set" ball. Then, I realize I completely forgot about my son's teachers. One would think, "that's not so bad. Pick up one or two cards." Right?

Wrong,
            again.

For one, my son goes to a creative school where he has two main teachers, but also four other teachers that frequent the classroom. So that's six, plus the school Director. 6 + 1 = 7.

Second, I wouldn't be Marilyn if I just went to the store and picked up a generic card. Boring!

Third, how could I resist creating something that I knew they wouldn't be getting from any other student?

Fourth, how else am I supposed to feed my addiction to crafting?

So I ran off to my local dollar store and picked up a bunch of adorable heart-shaped cookie cutters to create their own custom Valentine's Day cards.

You will need:
1. heart-shaped cookie cutters (we found ours at the Dollar Tree)
2. thin ribbon
3. red, pink or white heavy stock paper
3. pencil for tracing
4. exacto knife
5. paper bag or envelope to put the card in (optional)

Here is a snapshot of everything I used.

1. Cut your paper in half, into two long strips.

 2. Fold each strip in half.

 3. Trace a heart onto the front of the folded card. 

4. Let your little ones learn by allowing them to trace shapes with you! 
(Please keep that exacto knife far away!)

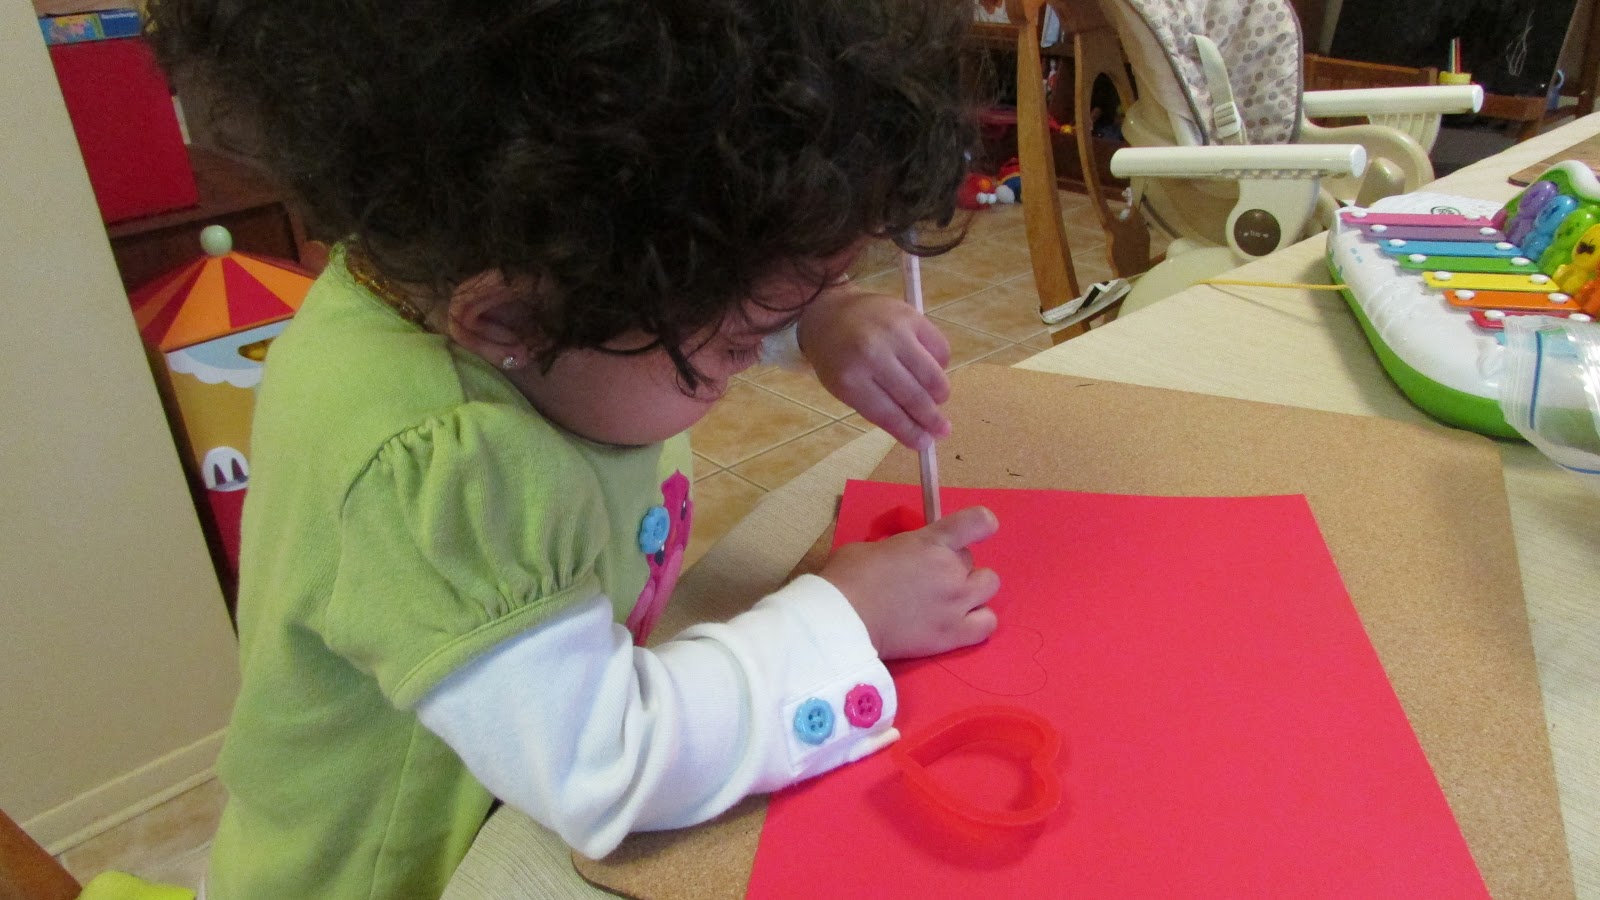
 5. Carefully cut out your heart shape. I found it easier to keep my cookie cutter in place and traced along the outside rim with the knife.

 This is what it will look like.

6. Thread thin ribbon along the top part of your cookie cutter.

7. Punch a hole along the middle fold of the card. Thread your ribbon through the hole and tie into a bow to secure your cookie cutter in the center.

8. You can hand-write or print a simple sentiment on the bottom. We printed a few and glued them onto the front with a glue stick. Lastly, you can place inside a pretty envelope or bag to hand to your child's teachers! 

xoxo!


Wednesday, February 6, 2013

Up, Up, and Away! Kids Cardboard Rocketship Tutorial


It is AMAZING how imaginative kids are. Every week my children teach me to see life totally differently. Whether its pointing out the "turtle" they see in the clouds or sword-fighting to rescue the hidden treasure, they see the world through creative eyes. 

It's no wonder why most education studies show that children thrive on pretend play. In fact, their development depends on it. 

So I should not be surprised then, that my 5 year old envisioned a rocketship when he saw our last shipment of diapers arrive. His eyes grew wide in excitement when he thought of the possibility. 

Easier said than done, but the look on his face was priceless when we were done. And I'm anticipating lots of fun pretend play with this new "toy"!

I will take you through step-by-step on how I made ours. 

You will need:
1. one large appliance box or two smaller boxes (we used two diaper boxes)
2. paint
3. hot glue
4. strong clear tape
5. decorative tape (we used blue painters tape, but duct tape would work great too!)
6. exacto knife
7. foil paper
8. patience (hehe)
(1)
First, paint your boxes. 

(2)
Next, stack the smaller box on top of the larger one. Make sure one side is totally taped and the other side (facing the back) is not. Then, hot glue the smaller box onto the larger one.
Reinforce the inside with strong tape.

(3)
Mark where you will cut any openings.
We decided on only one for the eyes, but you can do as many as you like.

(4)
Mark an "X" on the top of the box. Then cut with your exacto knife. If your box sides are tall enough, you can skip the next step. Ours was not, so we had to add length with aluminum foil. 
You want each triangle side to meet to form your rocket ship peak.

(5)
We added length by folding aluminum foil into long triangles.

(6)
 Tape your aluminum foil triangles to the top triangle sides you just cut on the top of your ship.

 This is how the back will look.

(7)
Next, cut an opening in the back so that your child can stand or kneel comfortably.

(8)
Finally, you can add wings by cutting out large triangle cardboard pieces out of leftover cardboard and covering in aluminum foil and tape.

(9)
Decorate to you and your child's delight! We added painters tape as a final touch. 
Finally, enjoy!!

xoxo!